


If you missed it, I’m transforming the outside of our house into a life-sized gingerbread house for Christmas this year, and these DIY Giant Lighted Peppermints are my first project of many to do just that!
I am SO obsessed with how these turned out, and I hope you are too!

I was inspired by a Home & Family Hallmark Channel DIY I saw a while back, but I put my own spin on these and they turned out WAY cuter than the Hallmark version if you ask me!
And if you have kids, I’d bet money on them absolutely loving these for Christmas! Ready to get started?
**This post contains affiliate links, which give me a small commission on items purchased through my links, at no additional cost to you. I appreciate you shopping through my links more than you know, and it truly helps me continue making great content for you to enjoy! For more information, see my Privacy & Disclosure Policy!**
SHOP THIS POST

DIY Giant Lighted Peppermints – What You’ll Need:
- round & flat meal prep containers with CLEAR plastic lid
- white & light pink gloss spray paint (or whatever other colors you choose!)
- red taillight tape
- cellophane (32″ wide)
- battery operated fairy lights (with either a timer, a remote, or both)
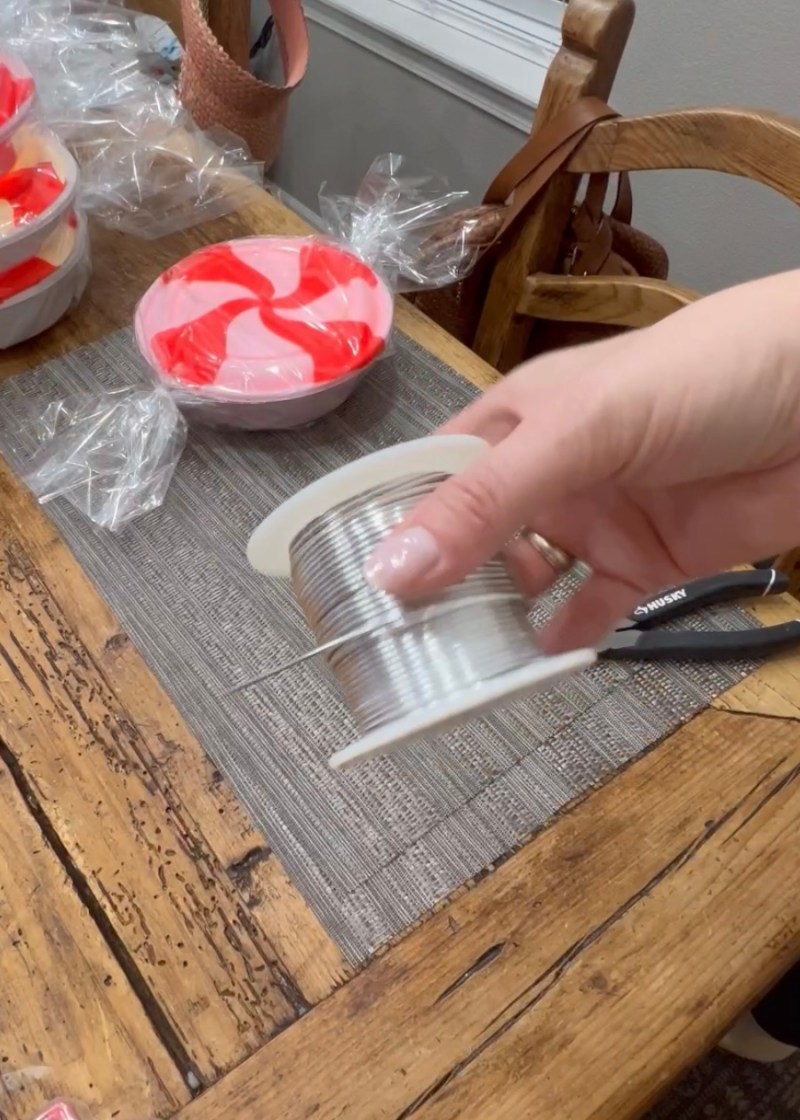
- 16 gauge wire
- scotch tape
- E6000
- small zip ties
- scotch tape
- scissors
- wire cutters
DIY Giant Lighted Peppermints – How To:
Step 1: Spray paint your meal prep containers with your chosen spray paint color (I made 5 pink and 6 white) Be sure to spray the INSIDE of the lids only, and both the inside and outside of the bottoms. Allow them to dry well.


Step 2: Once dry, trace one of your lids onto a piece of paper or thin cardboard. Make marks at 12, 3, 6, and 9 o’clock on the circle. Then make marks in the middle of each of those marks. You should have 8 equidistant marks outside your circle. Now connect the center of your circle to each of your marks in a peppermint-type pattern.


Step 3: Cut one section of your peppermint pattern out with scissors. This will be your pattern to cut peppermint pieces out of the taillight tape.

Step 4: Carefully cut out 4 peppermint pattern pieces from your taillight tape (you’ll use 4 per lid to create your full peppermint pattern). If you have a Cricut or something similar you might be able to use that to make this part go MUCH faster. But I called it an “experience,” popped on a Christmas movie and enjoyed the repetition of cutting the same pattern out 44 times (I made 11 total peppermints, hence the 44 pieces I needed to cut)!
TIP: Make sure you are cutting your pattern the same way on the taillight tape. I accidentally flipped my tape over and my pattern flipped – oops! It’s not a huge deal so long as you have 4 of a kind, but just keep that in mind as you are cutting.

Step 5: Once all your taillight pieces are cut, peel off the backing and tape it onto the top of each lid so the stripes of each “peppermint” is alternating between red and whatever color you spray painted in Step 1.

Step 6: Now, add batteries to your fairy lights and place them inside each container. If your lights only have a time, be sure to turn them on at 5pm or 6pm so they run automatically at night. If they have a remote, you won’t have to worry about that – you’ll be able to turn them on and off whenever you like! Secure the lid on top so your fairy lights are now safely inside your container.


Step 7: Now for the extra special touch – cellophane! Measure and cut your cellophane so it’s about 4-5 inches longer on each side of your peppermint. Wrap up each peppermint in the cellophane and use scotch tape to secure on the back. Be careful not to tape to the spray-painted container, or the tape may later pull up the paint.

Step 8: Use small zip ties to cinch in each side of the cellophane to create your adorable wrapped peppermint!

Step 9 (optional): If you plan to use your DIY Giant Lighted Peppermints on an indoor Christmas tree, you can skip this step (the peppermints can be stuck right into the tree without really needing to be secured). However, if you’re going to put these peppermints outside like I plan to eventually, this step is a must! Cut a piece of 16 gauge wire with wirecutters and use E6000 glue to secure the fire to the back of your peppermint (on the cellophane). Allow to dry for 24 hours.

Step 10: Once your wire hangers are dry, you can now attach these to garland outdoors with ease! I’ll update this blog post once I decorate outside to share what they look like on my life-sized gingerbread house!


SHOP THIS POST
For now, I’m enjoying these cuties on my Christmas tree! I love that they look cute with the lights inside of them off or on, especially on a lit tree (so if you wanted to cut costs, you could nix the inside lights if you wanted to!)
If you make these, let me know in the comments below!
And until the next DIY….


You clever girl